7 Steps to Launch Your First Money-Making Blog
Some of the links below are affiliate links, so we may receive a commission (at no cost to you), if you make a purchase through one of our links.
So you’re ready to start an income-producing blog. That’s great! The decision to start is the first, and probably most important, step. But where do you go from there?
What’s the next step??
That’s what this post is going to answer. It is intended to be your ultimate resource for getting things off the ground.
And a bit about me- quickly. I’m a web developer, so I started my blogging life from the technical side. I’ve built many websites, but always for other people. Now I’m taking control of my own future, and building for me! I’ve built a profitable business from blogs, just like this one, a few times over. Now it’s time to pass what I’ve learned on to you.
There are tons of resources here (literally everything you’d need to get started), but all of this can be a lot for someone to take in at one sitting.
So bookmark this page.
This post is designed for you to come back to again and again as you progress through your first blog launch.
This post is so important, it’s the only post on our blog! …for now.
And you’ll notice a theme here- Keep It Simple! And focus on one thing at a time.
I tried several times to launch my first blog, and failed. My problem- I always looked at the whole process as one huge monolith, and I never took the first step. I didn’t know where to start.
Don’t do what I did!
Don’t get intimidated because you don’t know how to accomplish the 3rd or the 5th step, and never start the 1st step!
Take one step at a time, focus your time and energy on that, then move to the next. And you will create a money making blog.
Here are the basics of what we’ll be covering.
And by basics, I mean basics. I’m going to cover each step for the absolute beginner, assuming very little prior technical knowledge.
- Pick your niche (what your blog is going to be about).
- Create your website.
- Create logos and brand your website.
- Add content (posts) to your website.
- Set up monetization (AdWords, etc).
- Promote.
- Plan for the future.
If you follow these 7 points step-by-step, focusing on one step at a time, you’ll have your first income-producing blog up and running in no time.
So let’s get started and get you even closer to making money online!
Before step one
Let’s take a minute to talk about why we’re here. Hopefully, you’re here because you want to start making money online with a blog. So then the big question is can you make money with a blog?
That answer is yes and no.
Yes, a blog can make money.
But no, you will not make money directly just by starting a blog. (Unless someone is paying you to start a blog for them)
What I mean is, you make money off your blog IF your blog offers something of value.
Real money making blogs bring value to someone else.
They provide something the reader needs. And this builds an audience.
And these are the things that actually make you money: providing value and building an audience. The more value you provide, the bigger your audience. The bigger your audience, the more you’ll make off of ads, affiliate links, product sales, etc. etc.
Think about these things as we dive into the first step.
And remember– the only thing you should be thinking about right now is Step 1. Don’t spend your time and energy worrying about step 4, we’re not there yet!
Step 1- Pick your niche (what your blog is going to be about).
There’s a quick point to be made here first:
Don’t sweat it if you feel like you don’t have anything you can write about.
You may already know what you want your income-producing blog to be about. But it’s okay if you don’t. You’re not required to have that figured out at this point.
And you don’t necessarily have to pick the perfect subject matter right away. A lot of people have several blogs, so you don’t have to knock it out of the park with some grand idea on your first one.
What I think is more important than having the perfect blog, is having a blog!
What I mean by that is if the niche you pick in this step ends up not being perfect for you, that’s okay, you can create a blog about a different niche later. But you’ve at least proven the concept. You’ve proven that you can do this.
The thing that’s more important than picking a perfect first blog niche, is just creating your first blog!
Now back to picking a niche:
Blogs that focus on a targeted audience with specific content tend to perform better than blogs with broad subject matter.
For instance, instead of starting a blog about weight loss, you’d likely have better luck starting a blog about the Keto diet, or how to prep meals at home with a busy schedule. Those are examples of a niche.
We’re primarily here for one thing, to make money with a blog. So let’s take a look at the top money-making categories.
These are some of the top blog categories for producing income:
- Personal finance
- Health and fitness
- Online income
- Frugal living
- Personal development
- Beauty and fashion
- Food
If you feel like you don’t know anything about any of these categories, don’t give up yet! Chances are you know something about one of these topics, and you don’t necessarily have to be an expert to start a money-making blog on a certain topic.
So what if you’re a beginner when it comes to health and fitness? Does that mean you shouldn’t consider a niche in that category? Absolutely not!
Guess what most readers are looking for when they land on a new blog: beginner-level content!
You can easily learn enough about your niche to write a handful of beginner-level posts, and grow from there.
It’s important to note here that a few of these categories could be extra challenging to build a money-producing blog (numbers 6 & 7 above). Beauty and fashion blogs are almost required to be video-centric. It’s very tough to build a money-making beauty and fashion blog without quite a bit of video content. So keep that in mind.
Also, recipe blogs can be very tough to monetize. We’ve learned people just want the recipes and nothing else, so it’s very tough to build an audience. There are exceptions obviously, but it could take a lot of time build up a blog and brand in that niche.
So pick a category from the list above. They are already money makers, and have lots of people searching the web for information.
Then, see if you can find a niche.
A lot of bloggers call this “niching down” (but I hate that term). Almost any niche in these money-making categories would be a decent start. A good way to find a niche- throw one of these categories in the search bar on Pinterest, and see what comes up. I’ll do this with a few examples, but you should definitely do it yourself too.
Searching “Health and Fitness” on Pinterest brought up some of these pins:
“9 healthy habits you could do every day’ – a possible niche here is healthy habits, or life hacks.
“How I buy cute yoga outfits on a budget’ – possible niches here are workout apparel, or budget fitness.
“Health benefits of fruits and vegetables’ – a possible niche here is vegetarian living.
So there’s a little potential homework for you here. Take some of the categories and do a little brainstorming to come up with potential niches.
Then… pick one.
For my first blog, I didn’t spend a lot of time on this step. I picked my niche from these 5 “easy” categories in about 5 minutes and never looked back. Since then I’ve grown into other niches, and they all make money.
Again, what’s more important than having the perfect blog? Having a blog!
So just pick one already and let’s get started!
I will say at this point, some bloggers say you should only pick a niche you’re “passionate” about. But this post and The New Money Tree website is about making money online, not necessarily writing about your passion. We look at blogs as businesses, as numbers. So it’s definitely a bonus if you are passionate about your niche, but it’s not a requirement to make money online.
2. Create your website.
So here’s where things can get a little technical, but honestly creating a website seems a lot harder than it is. And it’s certainly easier than it used to be!
To begin, let’s go through some terminology. Three words you’ll hear a lot, or have already been hearing, are: “hosting”, “website”, and “domain”.
They are all very different things, so let me briefly explain what each one is.
And don’t worry, there’s no test at the end…
A website is essentially a collection of files written in code, typically a combination of HTML and JavaScript. That’s all it really is. Your browser (Chrome, Firefox, Safari, etc) is a computer program that reads the HTML and JavaScript code and presents the “web page” to you in a human-readable way. Don’t worry, you won’t have to write any of this code. There are wonderful tools and website builders out there that will create a fully functional, beautiful website without you ever having to look at the code. We’ll be using a website builder to set up your first blog, which is super easy. So, more on that later.
A host is where this website will live. As mentioned above, the website is essentially a collection of files written in code. Well, these files have to live somewhere. A host offers online space to store your website’s files and handles your website’s visitors. The host is responsible for keeping your webpage available and online. You could technically host a website yourself on your own computer. But your computer would have to always be online and have the processing power to handle thousands of users (hopefully) and never go down. Trust me, you don’t want to deal with that. So we’ll outsource this. I’ll walk through picking a hosting provider later.
Plus, many hosting providers integrate seamlessly with website builders like WordPress, making things even easier.
A domain is the human readable address of your website. So we’ve covered that a website is a collection of files written in code, and a host is where those files live. Well, there are millions of websites living on hosting space, so we need a way to find them. Each website has a numerical address that indicates where it lives. A domain is a human-readable address that stands in for the tough numerical address of where your website lives. When you enter a domain into your browser, your browser is able to use that as a global address to find the files of your website and render them to you.
Simple right?
Again… there’s no quiz at the end, so let’s just move on. All of these pieces work together pretty seamlessly. You’re only going to have to go through a small handful of steps and make a few decisions to get everything set up and running, and then from there, it’s “out of site, out of mind”. It’s a fairly trouble-free process, as long as you have a (very) basic understanding of the principles we just covered.
So let’s get started.
Pick a host and website builder:
I’ve got these two tasks together for a reason. There are companies out there now that actually roll both of these steps into one.
Like Wix for example. They offer hosting and their own website builder, and it’s all kinda rolled into one seamless experience. For the beginner, I couldn’t recommend them more highly. After a few minutes (literally), you’ll be up and running with Wix, it’s super easy.
 Wix makes it so easy, that if that’s the route you want to take, there’s really nothing else for me to explain in this section. They’ll walk you through it so easily and clearly, there’s nothing left for me to tell you, so you could skip to step 3! (but don’t, there’s still good info below).
Wix even has blogging tools built right in! You can easily write directly on the platform, and it includes many features to optimize your process.
 If you don’t go with one of these all-in-one providers like Wix or Squarespace, you’re doing what’s known as “self-hosting”.
The advantage to this route is that you have more control over the technical side of your website. For self-hosting, I’d recommend either Bluehost or Hostgator.
Even though you’re going kinda “a-la-carte” here and handling your hosting and website builder separately, both Bluehost and Hostgator are super easy and you don’t need any prior technical experience. They offer step by step guides to get started and up and running.
They both also have great customer support. In just a few minutes you can either be on the phone or in a chat with someone, and they’ll walk you through anything regardless of how much of a newbie you are. They’ll help with anything, just reach out.
Both Bluehost and Hostgator offer “one-click installs” of WordPress. Which is my website builder of choice.
Remember how we discussed that hosting is where your website lives, and we’d be using a website builder to actually create the website? Well, WordPress is one of those website builders, and Bluehost and Hostgator let you install WordPress with one click. Super easy.
So by now you’ve either decided to use an all-in-one hosting provider/website builder, like Wix. Or you’ve decided to go the self-hosting route and use a hosting provider like Hostgator or Bluehost and install WordPress on it yourself.
Next let’s pick your domain and get things up and running.
Decide on a domain:
This is essentially the “name” of your website. And a lot of people waste a lot of time and energy trying to pick the perfect domain.
But lets keep things simple- keep it relevant to your niche, and easy(ish) to remember.
Let’s use mine for example, thenewmoneytree.com. It mentions the word “money” (making money with blogs is my niche so that kinda fits) and it is more or less easy to remember. I spent maybe 5 minutes on this, so don’t get too bogged down here.
Put it all together:
If you’re going to Wix/Squarspace route, this phase is done for you. Otherwise, you’ll want to go to your hosting provider of choice and sign up now.
Most offer a variety of “hosting packages”, but you’ll probably just need the simplest one. This costs money, and there’s no real way around that (Wix can also costs a little money, this is just part of having your own website).
So sign up, and buy your hosting package.
Once you’ve bought hosting, you need to point your domain towards it. Your hosting provider should give you detailed instructions on how to do this in their documentation. But I would recommend using your hosting provider to buy the domain. That makes it easy.
Here’s an image of the Hostgator homepage. You’ll see the link right at the top for buying domains. Super easy:
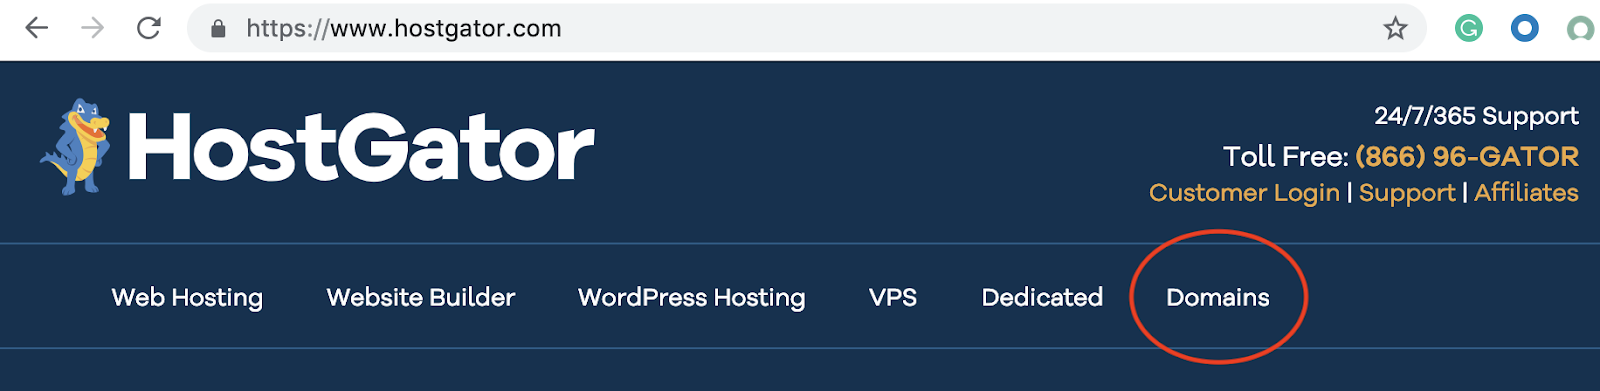
(The Hostgator homepage may have changed since I wrote this, but you get the point)

Next- install WordPress.
Once you purchase your hosting package and domain, you’ll need to install WordPress.
When you signed up for a hosting package, you should have been given a link to your hosting control panel, sometimes referred to as a “C-Panel”. Navigate to your control panel and look for the link for “one button WordPress install”, or “Build a new WordPress site”, or something of the like.
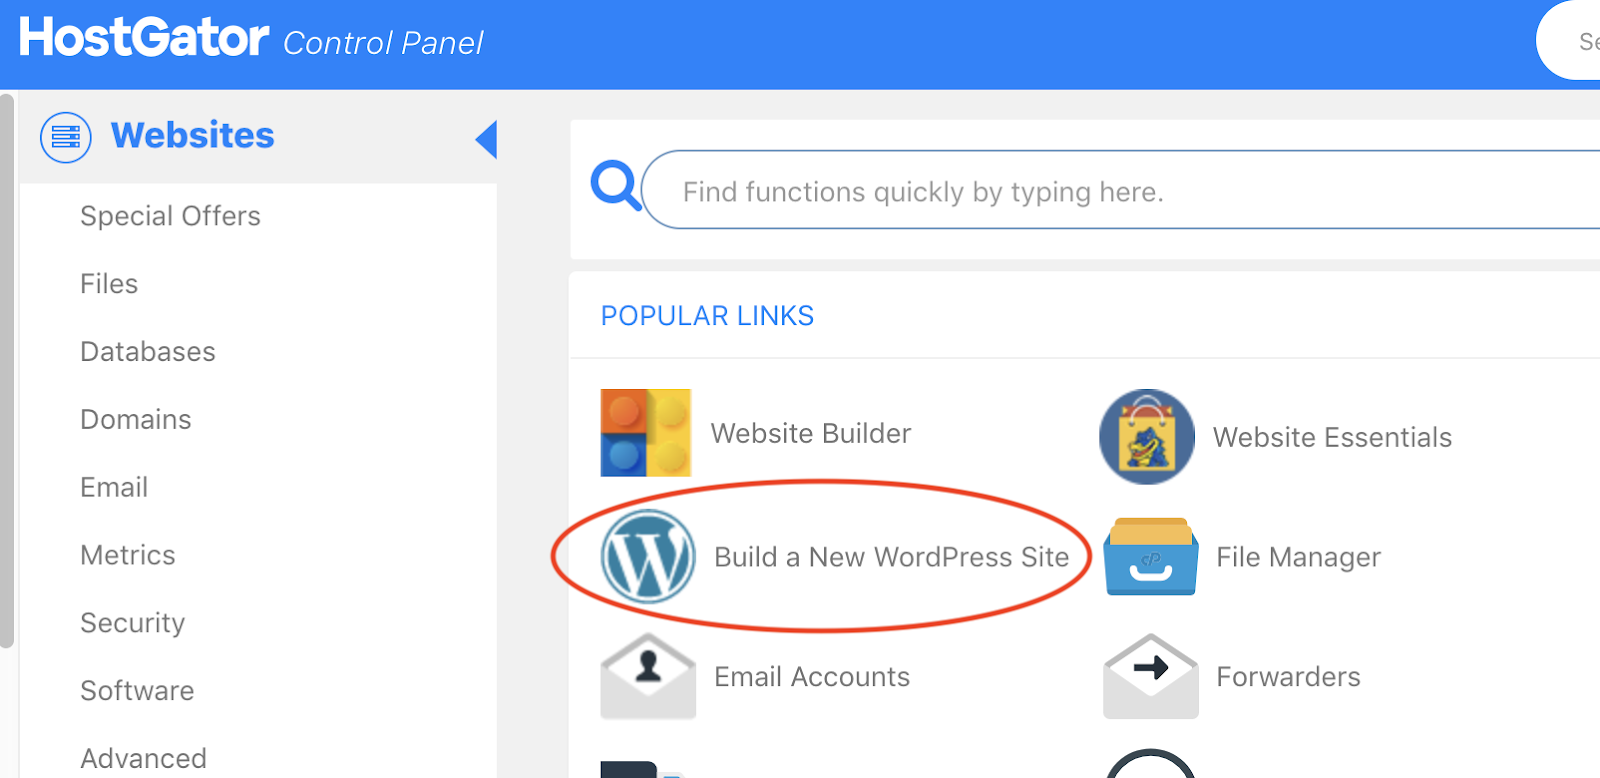
This link will walk you through getting WordPress installed on your website. It is very well documented and a super simple process.
By this point, you technically have a working website! Whether you used Wix or set it up a-la-carte, or went with self-hosting and installed WordPress, you have a website.
WordPress comes with a few standard “themes” for your site. We’ll be configuring that next.
If you went with Wix, you’re probably already knee-deep in designing your site since it’s so simple. But we’ll walk through the logo and branding steps next anyway.
3. Create logos and brand your site.
So you technically have a website, but now you need to make it pop. This is way easier than it seems.
I used to get stuck on this step every time I would try to start up a website. I knew nothing about branding!
I had no idea where to really start, so I never actually tried to create logos and branding.
I just always looked at it as this big enigma that I knew nothing about and would give up.
In walks Fiverr!
Get a logo:
For your logo, unless you have experience as a graphic designer, you’re going to want to outsource. The good news, there are a handful of websites that make this super simple.
The logo for thenewmoneytree.com was created and delivered in less than 30 minutes. And the good thing is you can always change this later. Don’t stay up all night trying to find the perfect logo, just get something together now and get it on your site.
Head over to fiverr.com and start searching for a freelancer. There are literally thousands of people waiting to build your logo, and sometimes for as low as $5. They usually turn work around in less than a day, sometimes they offer delivery in less than hour!
There’s also upwork.com. I’ve used both and it’s always worked out great.
Nail the styling:
Now that you’ve got a logo, it’s time to put it on the site and work out the rest of your theme and styling.
Again, don’t stay up all night on this!
No matter what theme you pick or what styling decisions you make, you’ll feel differently about it later. So just go with what feels best right now and you can always update/upgrade later.
If you’re on Wix, you don’t really have to worry very much about themes. They walk you through the styling process and their design/styling tools are top notch.
If you’re self-hosting and working with WordPress, you have a few out of box themes installed that you can use, or you can go with a third party and increase your choices.
Go ahead and login to your WordPress site and upload your logo. Then we’ll start browsing “themes”.
Themeforest.com is a great place to start. Browse around, find one you like, download it, and throw it on your WordPress site. Themeforrest and WordPress both show you how to do this easily.
Keep in mind, Themeforest.com is not WordPress.com. They offer themes that you can install on a WordPress site, but you have to install it yourself. But they offer how-to articles and clear instructions that explain how to install your theme on your website. Easy steps.
By now you should have your website up and running, with your own logos, and you should be reasonably happy with how it looks.
Now, we need to add something for people to read.
4. Add content (posts)
Step one- start writing!
Honestly for me, this is literally the hardest part. The technical stuff can certainly have its own challenges, but nothing slows me down like writing content.
I procrastinate, I get writer’s block… it’s a struggle.
But I’ve learned something important: Just. Keep. Writing.
You don’t have to write the perfect post. You don’t have to write all your posts at once. You just need to start writing.
I try to focus on one post at a time. And that’s particularily important for your first blog.
Pick your niche, buy your domain, get your website up and running, and get one post on it.
Then, we’ll worry about the rest.
Seriously. If you need to, leave this post now (after you bookmark it), get your website up and running, and start writing your first post.
When you are reasonably happy with it, come back here and pick up where you left off.
Think of this as your first real milestone- get one post on your site. Keep saying this goal to yourself over and over until it’s done:
“I need to get one post on my site.”
“I need a website with just one post on it.”
The rest will come, and much quicker than the first post. But you have to start somewhere: get one post on your website.
A note about content:
Keep it simple.
Write your first post (and really most of your posts) for the beginner.
Keep in mind, the best way to have a successful blog is to bring value to people’s lives. The more value you provide, the bigger your audience. The bigger your audience, the more you’ll make off of ads, affiliate links, product sales, etc. etc.
Write something that will be of value to your readers, and the readers who are in need of value the most are beginners. So start there.
5. Set up monetization (AdWords, etc).
There are arguably probably a dozen ways to monetize a blog. This task can seem arduous and daunting at first. Especially if you start consuming too much information about marketing strategies, sales funnels, etc. etc. Those are things you’ll want to dive into as your audience grows and your blog business matures. But for now, as with everything else we do here, we’re going to keep it simple.
Here are a handful of the core methods used to monetize a blog:
- Advertisements
- Affiliate marketing
- eBooks
- Products
- Coaching
Advertisements
Google AdSense! This service can be your friend.
Essentially there are two types of advertising- PPC (pay per click) and CPM (cost per click).
PPC is typically better for high-traffic sites because it requires clicks. If a user doesn’t click on an ad, you don’t make money.
CPM is typically better for lower-traffic sites, because it pays based on impressions, meaning you get a payment for every time someone sees OR clicks on an ad.
Go create an AdSense account now.
Google will then supply you with a short code that you put on your website, and automagically ads will start showing up! It’s that simple.
Google AdSense integrates seamlessly with Wix and WordPress. Both have easy ways for adding an AdSense code to your site.
WordPress offers a couple of well-supported plugins that will help manage AdSense- Advanced Ads and Ad Inserter.
Both of these plugins help manage ad type and placement. So both, as well as AdSense in general, will require a little education. It can be a lot to take in at first- which ad type is best for my site? should I put ads between my post paragraphs, or only at the bottom? With configurations and settings being required on both the plugins and in your AdSense account.
Sometimes, AdSense can take some time to become active. Google does some behind the scenes things, and no one really knows how long that will take. If your AdSense account isn’t activated right away, don’t worry.
Don’t sweat too many of these details yet! Just start with getting an AdSense account, and linking it to your site with one of the above plugins.
Then, later, worry about how best to manage your ads.
Affiliate Marketing
Throwing ads on your site can be kind of a “spray and pray” strategy. It can take a long time to generate the traffic needed to see some real income from it.
In comes Affiliate Marketing!
As you build an audience, you’ll be in a position to promote products on your blog. That’s essentially what affiliate marketing is. People pay you to drive traffic to their products.
And you choose the products you want to promote, so you’re able to provide value to your audience by recommending good products. And we know how important providing value is.
Essentially you:
- Find an affiliate program that supports your blog’s niche
- Add links to products you like on your blog
- When someone from your blog goes to that link and makes a purchase, you get a commission.
How you present these links to your audience is important. You can easily drive some of your audience away if you’re relentlessly pushing dozens of products in their faces. This is called a “linking strategy”, and you’ll want to learn more about those as your blog matures. But for the time being, stick to our rules and keep it simple.
eBooks
The first two methods for monetizing your blog- ads and affiliate links- are fairly broad. They are geared towards the general traffic that comes across your site.
eBooks are a bit more focused.
So think about this- if you have a blog, you’re already writing. You are generating content at some type of regular interval. The general idea behind monetizing an eBook is that you take what you’ve already put on your blog for free, write in some additional value-adding material to it, and package it as an eBook for purchase.
Typically I see people selling their first eBooks on their blog for a relatively low price. Something like $0.99 or $1.29. When you first start out, you’re not necessarily a recognized expert, so this price point makes sense.
Speaking of recognized experts, I think that’s one additional benefit of becoming an author and publishing an eBook: when your audience sees eBooks for sale on your site, they automatically assume you’re a bit of an expert. You get some instant street cred.
As your audience, blog, and business matures, you can adjust your publishing strategy. If you are indeed becoming an expert, people may be willing to pay a bit more for your literature.
Publishing an eBooks is actually incredibly easy. You can even publish directly to Amazon with their Kindle Direct Publishing program.
I would recommend starting with your regular blogging approach. Whatever process you use to create a new blog post, use that to start your first eBook. Or you could actually take some of your most popular posts and convert those to an eBook- using the posts as the foundational content of each chapter in your book.
Once you have it written, it’s easy enough to convert it to a pdf. But the Kindle Direct Publishing content supports pdfs and/or Word docs with very simple steps to go directly to published.
If you really want to stand out, you can try an eBook service, or ePublisher. They have some tools that may come in handy, like drag and drop graphics, etc.
Products, Coaching & More
I think it’s safe to say that if you’re still reading at this point, you have enough to focus on to monetize your blog. Usually, a blog is fairly mature before products or coaching make sense as a monetization approach. But we’ll touch on these briefly.
Remember, we’re keeping things simple!
Selling products could include things like webinars, videos, downloadable guides, emailed guides, or other resources related to your blog’s niche.
Coaching is just that- you sell access to your expertise, usually in small groups or a one-on-one setting. This could be via Skype, Slack, WebEx, email, phone, text, etc.
Sponsored posts– if your audience is big enough, people may be interested in paying you to write something about them or promote their products. There are LOTS of things to consider here, even FCC rules, so be sure you’re ready before you venture into this territory.
Email marketing– this one may actually be worth considering at this point. If you are comfortable handling your ads and affiliate links, maybe email marketing is the next step.
To further monetize your blog with email marketing, essentially you’re going to want to collect a list of emails from your audience. There are a number of ways to do that. You can ask your blog users to subscribe to a newsletter (which you’d have to write and make sure provides value to your audience without burning them out).
Then you can promote new posts, content, eBooks, etc through your email list, driving more traffic. There is still a lot to consider here, and a lot of debate about frequency of emails, and how not to lose your audience.
6. Promote.
Okay, so you’ve picked your niche, set up you website and got it looking good, and you’ve focused on getting at least your first post up on your site… now what?
Time to start driving traffic to your blog.
This next statement may surprise you. It surprised me:
One of the best networks out there for promoting blogs is Pinterest. Yeah, Pinterest.
I know of several blogs that use Pinterest almost exclusively for promoting and driving traffic. I used to think of Pinterest as a place to get ideas for the new tile in my kitchen, or BBQ ribs recipes.
But Pinterest has become so much more! It’s essentially a visual search engine.
Statistically speaking, it’s probably how you landed on this site :). It’s a very powerful tool to help build your audience and drive traffic to your posts.
So, how do you leverage Pinterest to help monetize your blog?
Step 1, create an account now and start interacting with other people in your niche. Now!
Or if you already have an account, convert it to a business account. This is done in your profile settings.
But either way, start pinning and saving now! It can take a few weeks to really grow your own following, so start working on this now. By the time you have your site up and running are ready to promote, you’ll be ahead.
It’s a good idea to create several boards, maybe around 12-15, in your niche. And then you’ll want to create a few boards specifically for your blog.
Essentially, you should regularly pin and save posts to your niche boards to gather a following, then when you create a pin for your own blog, you have a ready and willing audience.
Group boards can be a great way to increase that audience size. There are tons of posts out there about this- how to join them, how to best utilize them for your strategy, whether they’re really all that important… all of that is beyond the scope of this post, but just know it’s something you should look into to. If you can get involved in a few popular group boards, your blog will see an incredible amount of traffic.
But you can’t just be posting any old pins and be successful. You need to create “click-worthy” pins.
They need to look visually appealing and have catchy, intriguing call to action text across the imagery.
This is incredibly important. You may have an amazing website and great content, with a pipeline full of products to launch… but if your pins aren’t driving traffic to your blog, your content may go unread.
Other Social Media
Pinterest isn’t the only option out there, although at the time of writing this it is by far the most effective. Generally speaking, the same approach can be taken for most any social media platform- engage with the community around your niche, gather an audience, drive them to your posts.
With Facebook, this can be done through “groups”. With Instagram, this can be accomplished through hashtags, etc. etc. There are plenty of resources available for each platform. But the purpose of this post is to keep things simple and get you started! So we focus on Pinterest first, then once you’ve gained some traction and some experience, start considering broadening your strategy to include other platforms.
Advertise
I’m not going to spend a lot of time on this topic, because to me spending money to advertise your blog to bring in traffic is kind of a “specialty” approach. For the vast majority of blogs, this won’t be effective or necessary. You can drive just as much traffic to your website via the approaches I’ve outlined above. There may be a few edge cases or special circumstances where purchasing advertising may be the best route, but that is not common.
7. Plan for the future.
You’re already here. You’re already doing research and educating yourself. The best thing you can do to plan for the future of your blog is to keep that up. Keep learning!
Keep learning, keep growing, keep pushing yourself.
We’ve discussed everything you need to get up and running. But we’ve skipped over some important things for the goal of staying focused on what needs to happen first. Now that you’re up and running with your website, your first post, and seeing your first bit of traffic, time to keep pushing!
You could shift into neutral here and just coast for a few weeks, making a few bucks a month from your first few posts… or you could keep pushing yourself and grow your blog into a full blown business.
It IS possible.
Use the broad strategy we’ve outlined here- focusing on one thing at a time and keeping things simple- and gradually apply those ways of thinking to the next thing you need to learn.